

Running a blog giveaway is a great way to skyrocket your blog’s exposure and increase your audience.
Usually, setting up a giveaway is a time-consuming process that seems daunting to readers.
InLinkz can help you run a giveaway the easy way. Not only saves you from doing things manually but also makes entry easy for your readers.
Here is how you can set up an InLinkz giveaway in only four steps:
1. Go to your InLinkz dashboard and select to create a new link party
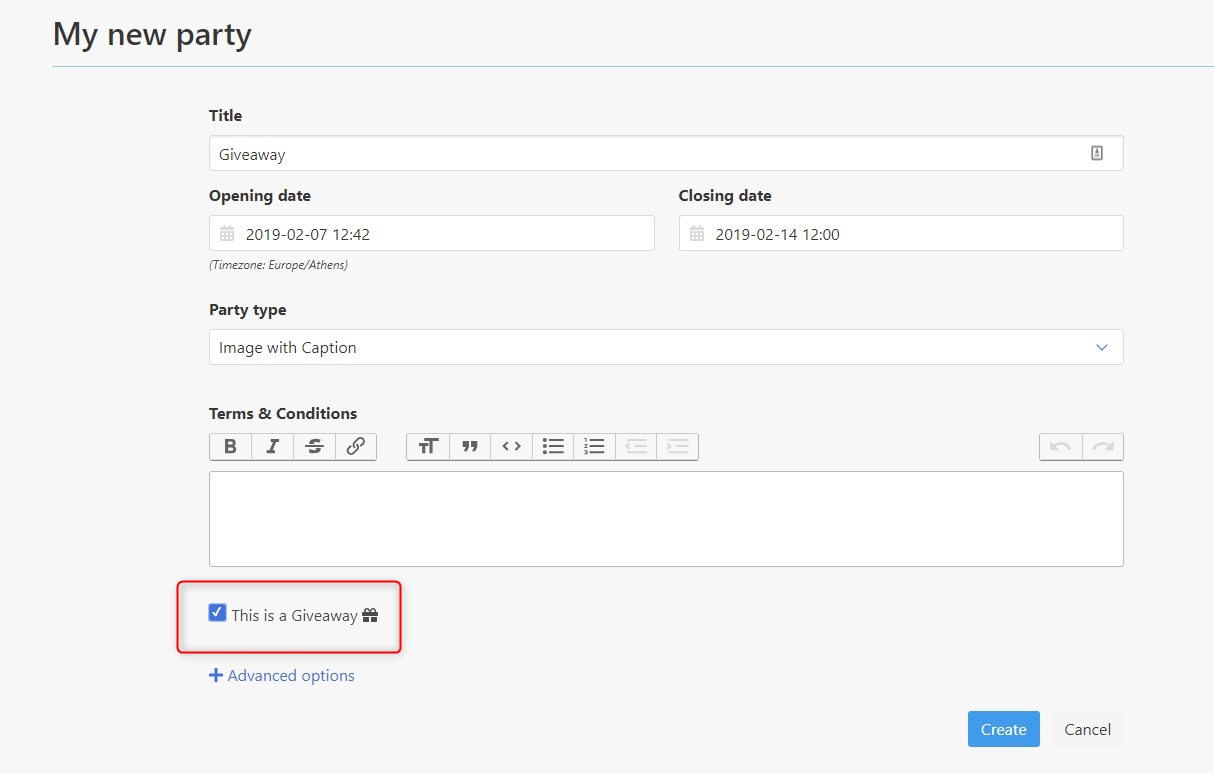
2. Enter the basic information regarding the giveaway, such as the opening and the closing date, the entry requirements/ rules (make sure you state them in a clear and consice manner) as well as the prize details.
3. Click on the Giveaway checkbox and your giveaway is ready to be launched.
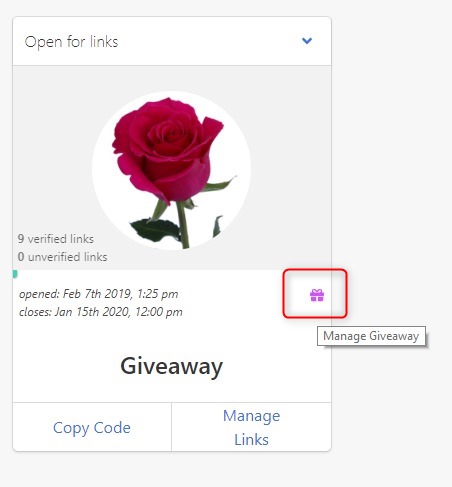
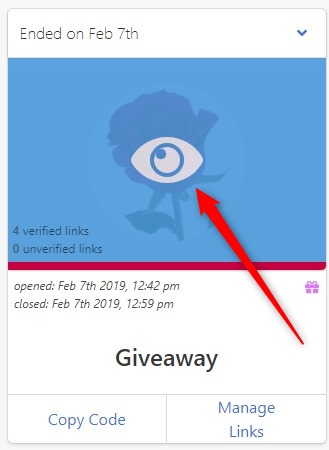
Once you have created a giveaway, a purple gift icon will be displayed on the party’s board which indicates the giveaway.
4. Add the code to your blog while on HTML mode and invite your readers to participate in your giveaway.
Spread the word!
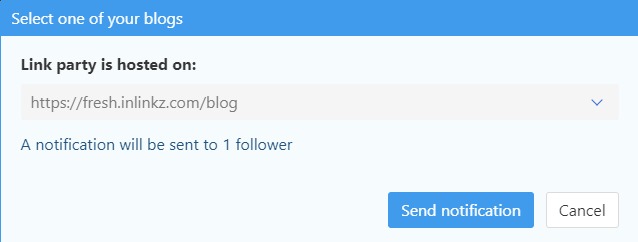
Notify your followers about the upcoming giveaway by enabling the corresponding option from your dashboard:
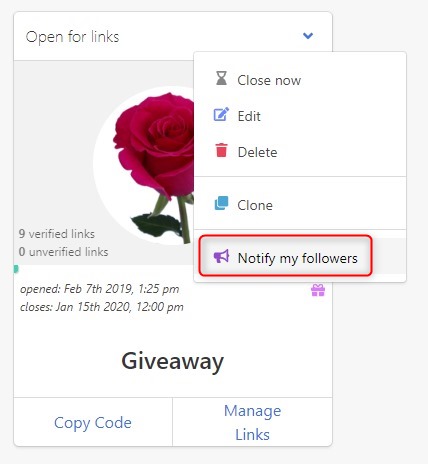
Once you have activated it, an email notification will be sent to your followers.
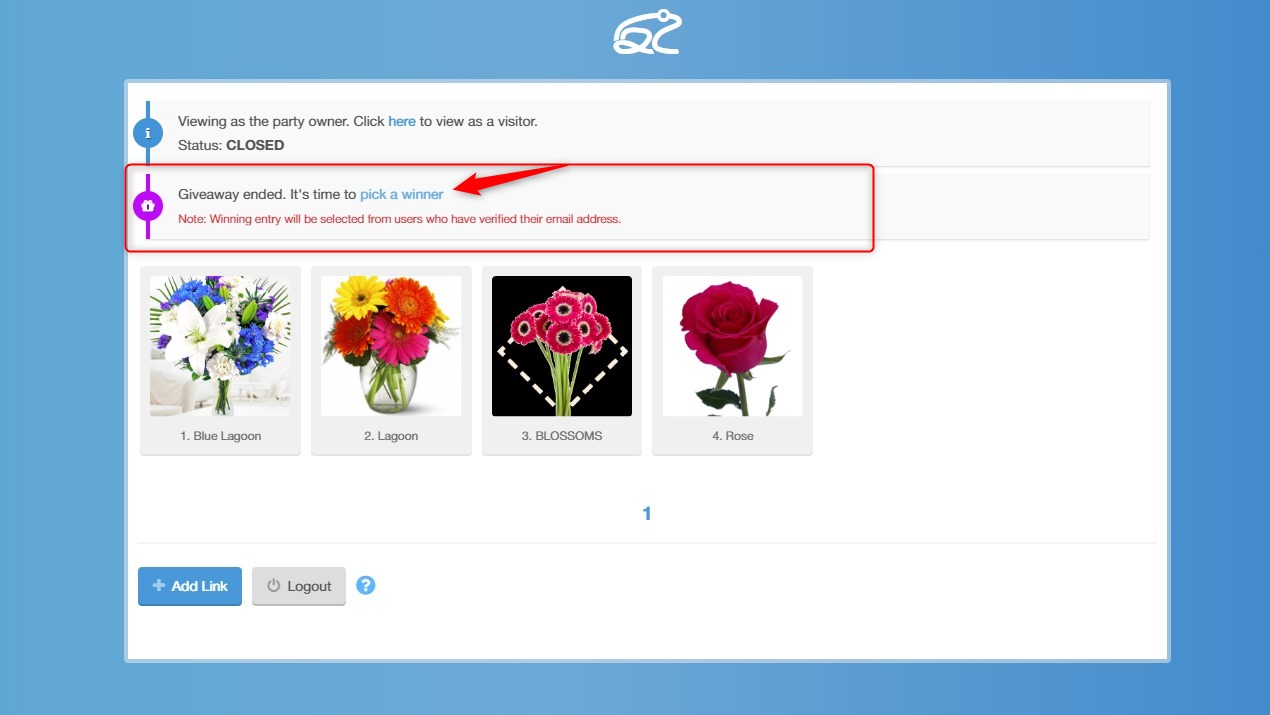
How to pick the winner
Once the giveaway period ends, you can use the widget to pick your winner.
1. Click to preview the giveaway or the gift icon to manage your giveaway.
2. Select to pick a winner by clicking on the “pick a winner” link.
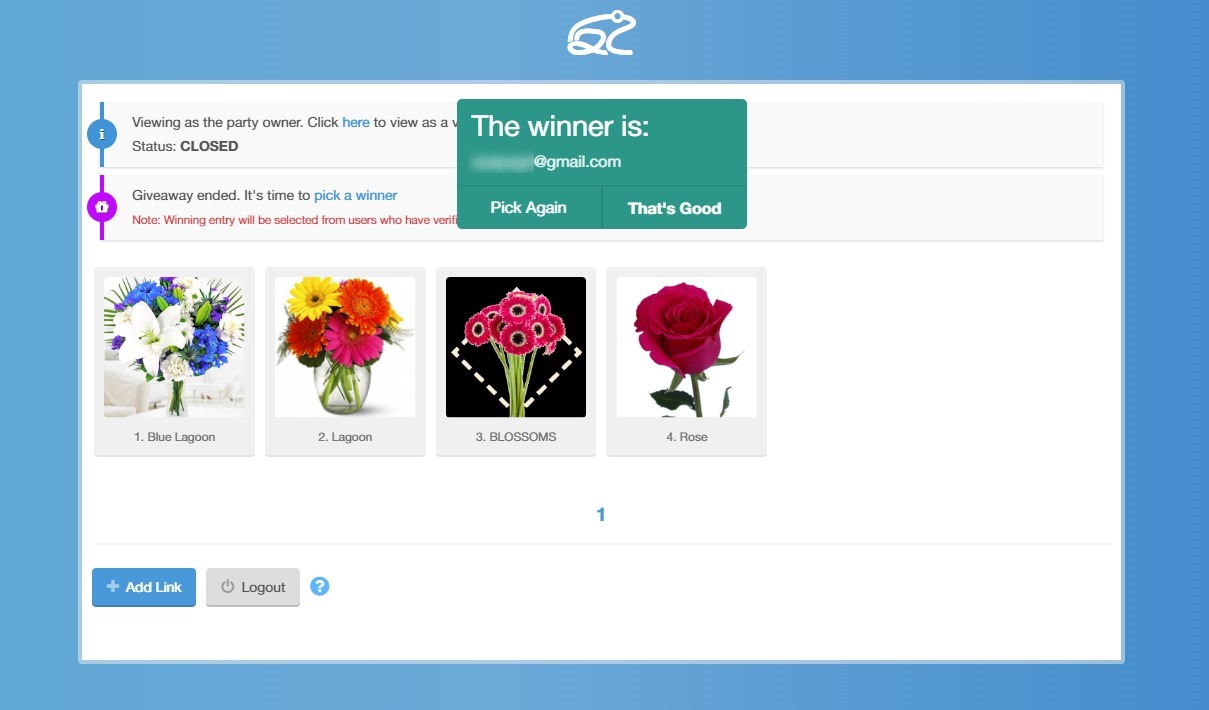
The system will randomly select a winner from the participated entrants.
Keep in mind that only entrants that have verified their emails are eligible to win.
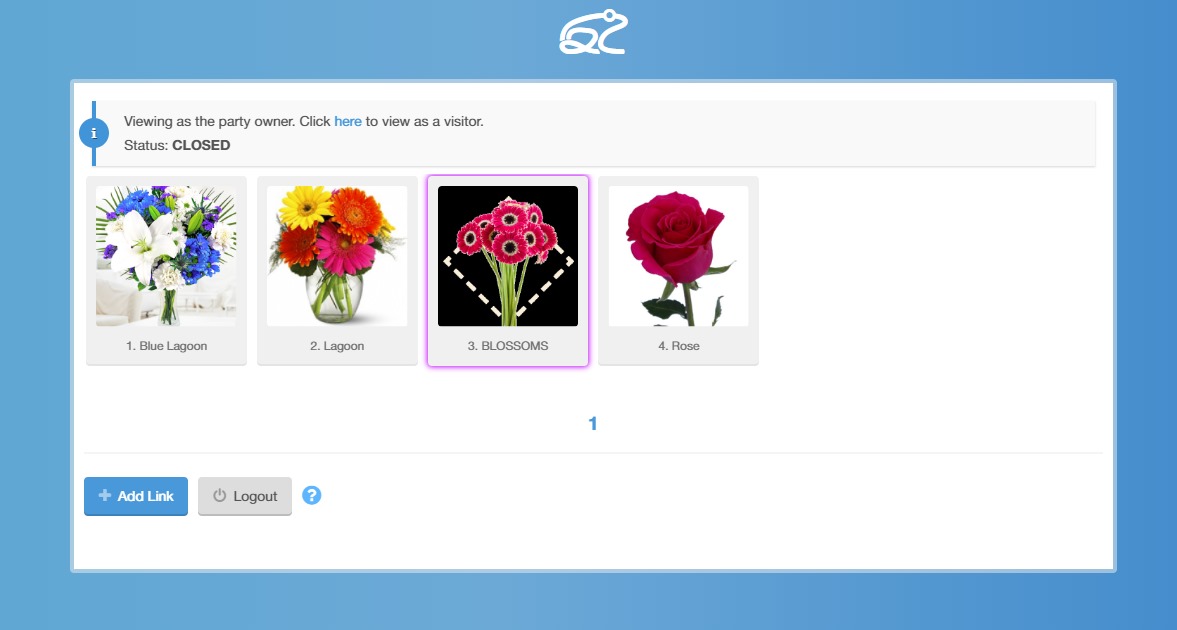
After you pick a winner, the winner’s link will be marked as purple in your collection.
Announce the winner on your blog as well as on your social networks for gaining more views on your blog.